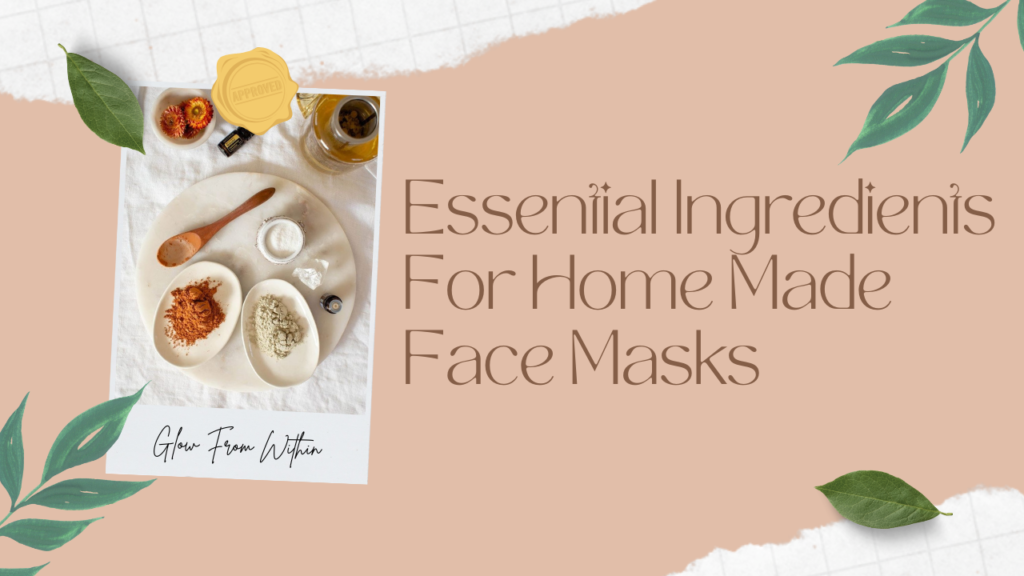
DIY FACE MASKS FOR RADIANT AND HEALTHY SKIN
Ever spent fifty thousand bucks on a fancy face mask that promised the world but delivered… disappointment? Yeah, me too. Turns out your kitchen might hold better skincare secrets than Sephora. DIY glow face masks for radiant and healthy skin aren’t just budget-friendly alternatives they’re powerhouses of natural goodness without the preservatives and mystery ingredients.
I’ve tested hundreds of homemade formulas (my bathroom looked like a science lab for months) and narrowed down the absolute winners for every skin concern imaginable. But here’s what nobody tells you about DIY skincare: the magic isn’t just in the ingredients it’s in knowing exactly when and how to apply them. And that little detail makes all the difference.
Understanding Your Skin Type Before Making DIY Glow Masks
How to identify your skin type at home
Ever tried using a face mask that left your skin worse than before? The culprit might be using products not meant for your skin type.Here’s a simple at-home test: Wash your face with a gentle cleanser, pat dry, and wait an hour. Then, press a clean tissue against different areas of your face.
- Oily skin: Tissue shows oil from forehead, nose, and chin
- Dry skin: Skin feels tight, maybe flaky, little to no oil on tissue
- Combination skin: Oil on T-zone (forehead, nose, chin), dry on cheeks
- Normal skin: Barely any oil, skin feels comfortable, not tight.
- Sensitive skin: Easily turns red, stings with new products
Pay attention to how your skin behaves throughout the day too. Does it get shiny by noon? That’s oily skin talking. Flaky by afternoon? You’re dealing with dryness.
Trageting skin concerns and with DIY Glow Masks
Not all natural ingredients are created equal when it comes to fixing skin issues. Here’s what actually works:
For acne and oiliness
- Tea tree oil (antibacterial properties)
- Clay (absorbs excess oil)
- Apple cider vinegar (balances pH)
- Honey (antibacterial but non-drying)
For dryness and dehydration:
- Avocado (healthy fats replenish moisture)
- Aloe vera (deep hydration)
- Yogurt (lactic acid gently exfoliates while moisturizing)
- Olive oil (locks in moisture)
For aging concerns:
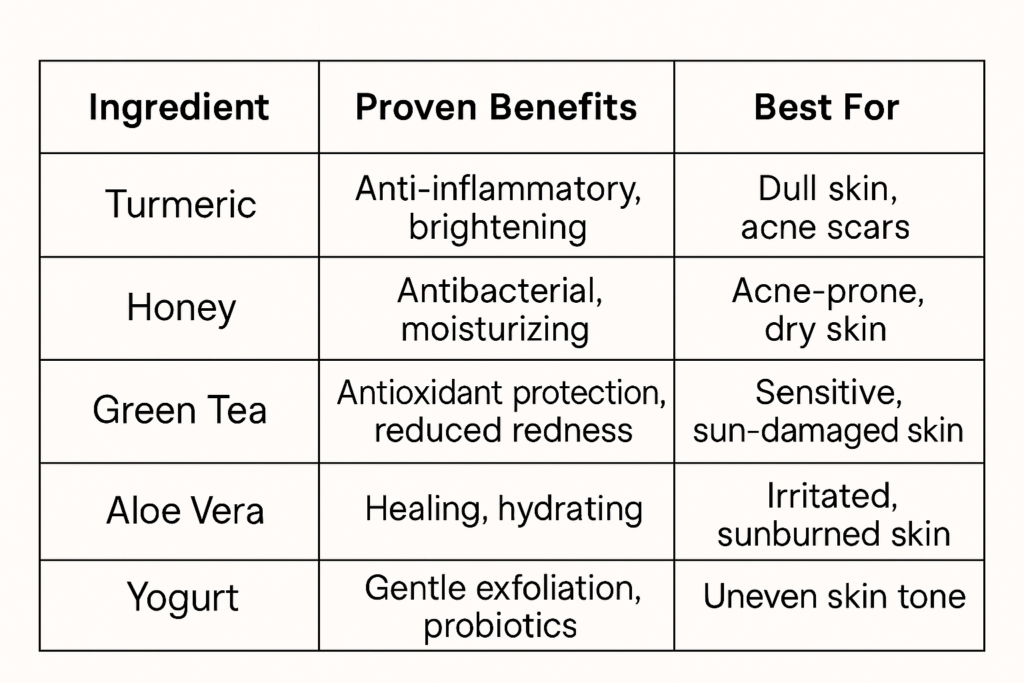
- Turmeric (anti-inflammatory, brightening)
- Egg whites (temporary tightening effect)
- Green tea (antioxidants fight free radicals)
- Papaya (natural enzymes exfoliate)
For hyperpigmentation:
- Lemon juice (use cautiously, only at night)
- Potato slices (natural bleaching properties)
- Tomato (vitamin C brightens)
The importance of patch testing DIY ingredients
I can’t stress this enough: that innocent-looking lemon in your kitchen can cause a chemical burn on your face.
Before slathering anything all over, do a patch test:
- Apply a small amount of your DIY mixture behind your ear or on your inner forearm
- Wait 24 hours (yes, a full day)
- Check for redness, itching, burning, or any reaction
Natural doesn’t automatically mean safe. Common allergens in DIY masks include:
- Citrus fruits
- Cinnamon
- Essential oils (especially tea tree and peppermint)
- Egg whites
- Strawberries
Even if you’ve used store-bought products with these ingredients before, the concentrated raw form might trigger reactions you’ve never experienced.
Best times to apply face masks for maximum benefits
Timing isn’t just about when you can squeeze in 15 minutes for self-care – it actually impacts effectiveness.
Morning masks: Go for hydrating, brightening ingredients. Your skin lost moisture overnight and needs a boost before makeup.
Evening masks: Perfect time for deep cleaning and treatment masks. Your skin’s renewal processes peak at night, so detoxifying clay masks or anti-aging treatments work best.
Post-workout: Your pores are open from the heat and sweat, making it an ideal time for detoxifying masks.
Pre-event (3 hours before): Use hydrating masks, not clay ones which might leave temporary redness.
Frequency guidelines:
- Clay/detox masks: 1-2 times weekly
- Hydrating masks: Up to 3-4 times weekly
- Exfoliating masks: Once weekly maximum
Remember that over-masking is a real thing. Your skin barrier needs time to recover between treatments.
A. Kitchen staples that transform your skin
Your kitchen isn’t just for cooking – it’s a goldmine of skincare wonders! That honey sitting in your pantry? It’s a natural humectant that draws moisture into your skin while fighting bacteria. And don’t overlook that container of yogurt in your fridge – it contains lactic acid that gently exfoliates dead skin cells, revealing brighter skin underneath.
Oatmeal isn’t just breakfast food; it’s a skin-soothing superhero for irritated or inflamed skin. Grind it into a fine powder and mix with water for instant relief. Got avocados? Their healthy fats deeply nourish dry skin. Even that coffee you brew every morning can be repurposed as a stimulating scrub that increases blood flow and reduces puffiness.
Sugar and olive oil make an incredible exfoliating duo when combined. The humble banana fights wrinkles with its potassium and vitamins. And don’t toss those cucumber slices – they’re packed with antioxidants that calm irritated skin and reduce swelling around the eyes.
B. Natural ingredients with proven skincare benefits
Skip the expensive products – nature’s got you covered with ingredients that actually work! Turmeric stands out with its curcumin compound that fights inflammation and brightens skin tone. Just be careful – it can temporarily stain your skin!
Green tea isn’t just for drinking; its polyphenols reduce redness and fight aging when applied topically. Aloe vera gel deserves its legendary status – it calms sunburn, soothes irritation, and hydrates without clogging pores.
Apple cider vinegar balances your skin’s pH and clears up acne when diluted properly. Raw honey is antibacterial gold that heals breakouts while hydrating. Coconut oil melts away makeup and delivers serious moisture (though it’s not for everyone – especially if you’re acne-prone).
Here’s what studies actually show about these natural wonders:
C. Ingredients to avoid for sensitive skin
Sensitive skin needs extra TLC when making DIY masks. Citrus fruits might seem refreshing, but lemon and lime juices are actually too acidic and can cause irritation or even chemical burns when exposed to sunlight. Ouch!
Cinnamon might smell amazing, but this spice creates intense tingling that can lead to rashes on delicate skin. Essential oils are natural but super potent – particularly peppermint, eucalyptus and tea tree can trigger reactions when used incorrectly.
Alcohol-containing ingredients like witch hazel dry out sensitive skin and damage its protective barrier. Raw egg whites, popular in some mask recipes, can cause allergic reactions and potentially expose you to salmonella if they touch broken skin or get near your mouth.
Listen to your skin! If something burns, itches, or turns your face red, wash it off immediately. That “good burn” feeling isn’t actually good at all.
D. Proper storage of homemade mask ingredients
The freshness of your ingredients makes or breaks your DIY skincare game. Store dry ingredients like oatmeal, rice flour, and clay powders in airtight containers away from moisture and direct sunlight. They’ll stay potent much longer this way.
For liquid ingredients like aloe vera gel or rosewater, small amber glass bottles are your best friend. The dark glass blocks degrading UV light, extending shelf life. Always keep these in the refrigerator and watch for any changes in smell, color, or texture.
Fresh fruit and vegetable ingredients lose their potency quickly, so only prepare what you’ll use immediately. If you have leftover avocado or banana, freeze small portions in ice cube trays for future masks.
Oils need special attention – store them in cool, dark places and remember that even natural oils eventually go rancid. That weird smell? It means it’s time to toss it.
E. Shelf life considerations for natural face masks
The brutal truth about DIY face masks? They don’t last like store-bought products with preservatives. Most freshly made masks should be used immediately or within 24 hours when refrigerated. After that, bacteria and mold start having a party on your creation.
Masks containing dairy products like yogurt or milk spoil quickest – use these right away. Honey-based masks last longer since honey has natural preservative properties, but still shouldn’t be kept more than 2-3 days in the fridge.
Dry mixes of powdered ingredients like clay, oatmeal, or rice flour can be prepared ahead and stored for months in airtight containers. Just add your liquid ingredients right before application.
Never make large batches of wet masks hoping to save time later – you’ll end up with a science experiment growing in your fridge! Single-use portions are always safest and most effective.
Want to extend shelf life slightly? Use distilled water instead of tap water in your recipes, keep utensils and containers scrupulously clean, and always wash your hands before preparing your masks.
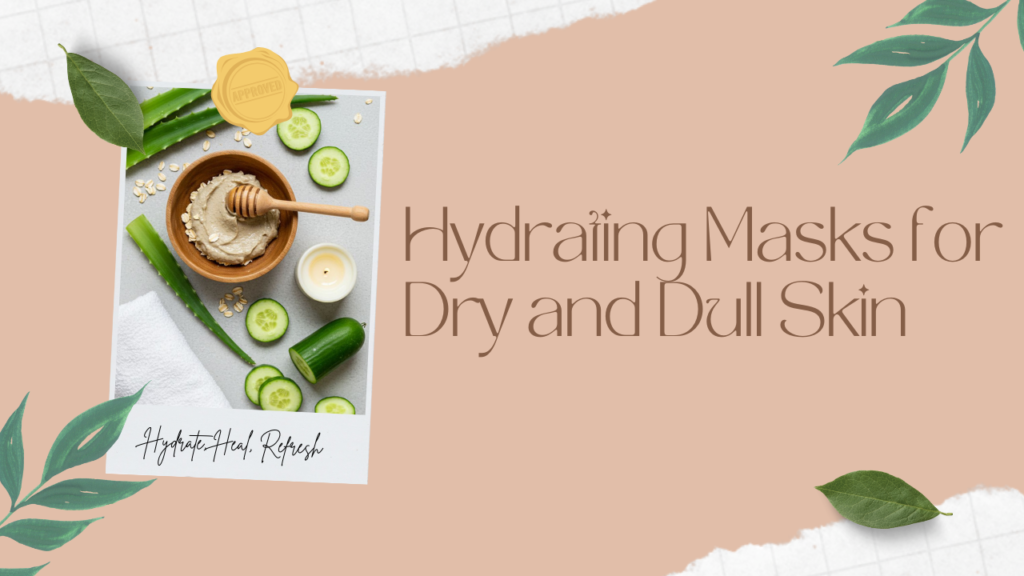
Dry and dull skin often lacks moisture, nourishment, and the natural oils needed to maintain a healthy glow. Environmental factors like harsh weather, pollution, and indoor heating, as well as lifestyle habits such as insufficient water intake, excessive caffeine, or over-exfoliation, can strip the skin of its vitality. That’s where hydrating masks come in. These DIY masks not only replenish lost moisture but also improve skin texture, restore softness, and add an instant glow — all using ingredients from your kitchen.
Why Your Skin Needs Hydration
Before jumping into recipes, it’s important to understand what hydration really does for your skin. Unlike oils that lock in moisture, hydration involves water content in the skin. When skin is dehydrated, it becomes flaky, tight, and more prone to fine lines. A good hydrating face mask helps to:
- Restore skin’s water balance.
- Plump up tired and stressed skin
- Improve skin elasticity
- Enhance the absorption of serums and moisturizers
Hydrating masks create a nourishing layer that allows your skin to absorb moisture effectively and glow from within.
DIY Glow Face Mask Recipes For Dry & Dull Skin
1. Aloe Vera and Honey Mask
This is a super soothing and deeply hydrating mask for all skin types — especially dry and irritated skin.
Ingredients:
- 2 tablespoons fresh aloe vera gel (straight from the plant is best)
- 1 tablespoon raw honey
How to Use:
Mix both ingredients into a smooth gel. Apply an even layer to your cleansed face and leave it on for 15–20 minutes. Rinse with cool water.
Why it Works:
Aloe vera is full of water, antioxidants, and anti-inflammatory properties that soothe and hydrate. Honey is a natural humectant — it draws moisture from the air into your skin and keeps it locked in.
2. Cucumber and Yogurt Cooling Mask
Ideal for hot weather or sun-exposed skin, this mask is calming, hydrating, and brightening.
Ingredients:
- ½ cucumber (grated or blended)
- 2 tablespoons plain yogurt
How to Use:
Mix grated cucumber and yogurt. Apply generously to your face and neck. Leave it on for 20 minutes and then rinse with lukewarm water.
Why it Works:
Cucumber has high water content and a cooling effect, reducing puffiness and dryness. Yogurt contains lactic acid which gently exfoliates dead cells while moisturizing and smoothing the skin.
3. Avocado and Olive Oil Rich Mask
This mask is perfect for extremely dry, flaky skin that needs intense nourishment.
Ingredients:
- ¼ ripe avocado
- 1 teaspoon olive oil
- (Optional: 1 teaspoon honey for added glow)
How to Use:
Mash the avocado and mix it with olive oil until smooth. Apply it all over your face and leave it for 15–20 minutes. Rinse off with warm water followed by a splash of cold water.
Why it Works:
Avocado is rich in healthy fats and Vitamin E which repair the skin barrier and deeply moisturize. Olive oil adds a boost of hydration and antioxidant protection.
4. Banana and Milk Cream Mask
A go-to for lifeless skin that needs a quick boost of softness and shine.
Ingredients:
- ½ ripe banana
- 1 tablespoon fresh milk cream (malai)
How to Use:
Mash the banana well and mix with fresh cream until smooth. Apply evenly and keep for 15 minutes. Wash off with lukewarm water.
Why it Works:
Banana hydrates and smooths dry skin, while milk cream provides natural lipids that deeply nourish and brighten the complexion.
Tips for Best Results
- Prep your skin: Always cleanse your face before applying any DIY mask to allow maximum absorption.
- Use once or twice a week: Hydrating masks should be used 1–2 times a week depending on how dry your skin feels.
- Lock in the hydration: After washing off the mask, always follow up with a toner and a lightweight moisturizer to seal in the benefits.
- Patch test first: Especially important if you have sensitive skin. Natural doesn’t always mean allergy-free.
Related Reads on Gleamora
To level up your skincare game and keep your glow consistent, don’t miss our other DIY skin treats:
- Natural Skin Remedies for Radiant and Glowing Skin
- Drink Your Skincare: Sip Your Way to Glowing Skin
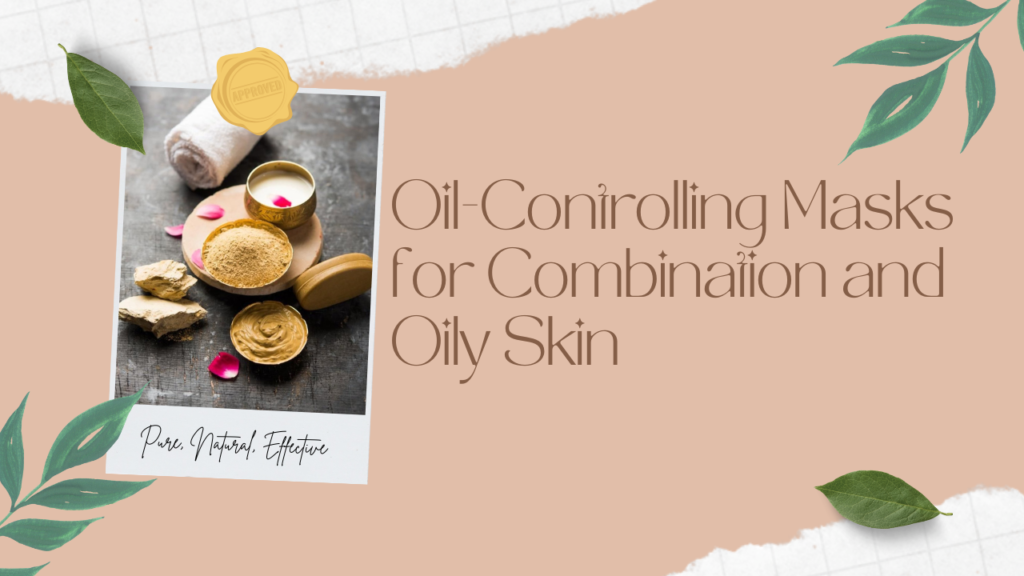
Combination and oily skin types often struggle with excess sebum, shiny T-zones, frequent breakouts, and enlarged pores. The key to managing oily skin is not to strip it dry, but to balance the oil levels while keeping the skin hydrated. When the skin is overly stripped, it overcompensates by producing even more oil. That’s why DIY oil-controlling masks work best when they clarify the skin, absorb excess oil, and calm inflammation — all while maintaining the skin’s natural balance.
Understanding Oily & Combination Skin Needs
Oily skin produces more sebum due to overactive sebaceous glands. Combination skin has a mix of oily (usually forehead, nose, and chin) and dry or normal areas (cheeks and jawline). Common concerns include:
- Shiny appearance
- Blackheads and whiteheads
- Breakouts or acne
- Clogged and enlarged pores
Oil-controlling masks target these issues by gently detoxifying the skin, tightening pores, and providing ingredients that regulate oil production without causing dryness or irritation.
DIY Oil-Controlling Face Mask Recipes
1. Multani Mitti and Rose Water Clay Mask
This is one of the oldest and most effective face masks for oily and acne-prone skin.
Ingredients:
- 2 tablespoons Multani Mitti (Fuller’s Earth)
- 2–3 tablespoons rose water
How to Use:
Mix Multani Mitti and rose water into a smooth paste. Apply evenly on the face, focusing on oily zones. Let it dry for 15 minutes and rinse off with cool water.
Why it Works:
Multani Mitti absorbs excess oil, tightens pores, and removes deep-seated dirt. Rose water soothes the skin and adds a refreshing glow without making it greasy.
2. Green Tea and Lemon Mask
This mask is perfect for calming acne and reducing oil while giving skin an antioxidant boost.
Ingredients:
- 1 green tea bag (brewed and cooled)
- 1 teaspoon lemon juice
- 1 tablespoon gram flour (besan)
How to Use:
Brew a green tea bag and let it cool. Mix 2 tablespoons of the tea with lemon juice and gram flour to form a paste. Apply to the face and let it sit for 15–20 minutes. Rinse with lukewarm water.
Why it Works:
Green tea is packed with antioxidants and reduces inflammation, while lemon juice helps control oil and brighten dark spots. Gram flour gently cleanses and exfoliates the skin.
3. Oatmeal, Honey, and Yogurt Mask
A gentle yet effective mask that controls oil while calming irritated or acne-prone skin.
Ingredients:
- 1 tablespoon finely ground oatmeal
- 1 tablespoon plain yogurt
- 1 teaspoon honey
How to Use:
Mix all ingredients into a smooth paste. Apply evenly to the face and leave it for 20 minutes. Massage gently while washing off to exfoliate.
Why it Works:
Oatmeal absorbs oil and reduces redness, honey kills acne-causing bacteria, and yogurt’s lactic acid removes dead skin and tightens pores.
4. Charcoal and Aloe Vera Detox Mask
Ideal for a deep pore cleanse and detox for oily and combination skin types.
Ingredients:
- 1 teaspoon activated charcoal powder
- 2 teaspoons aloe vera gel
- A few drops of tea tree oil (optional for acne-prone skin)
How to Use:
Mix all ingredients well and apply a thin layer to your face. Leave for 10–15 minutes and rinse thoroughly.
Why it Works:
Charcoal acts like a magnet to draw out dirt and oil. Aloe vera soothes and hydrates the skin, and tea tree oil helps fight acne bacteria without drying out the skin.
Tips for Best Results
- Apply to target areas: If you have combination skin, apply oil-control masks only to the T-zone and use a hydrating mask on dry areas (multi-masking).
- Don’t overuse clay masks: 1–2 times a week is enough. Overuse can strip the skin.
- Use non-comedogenic moisturizers afterward: To keep skin balanced and prevent rebound oil production.
- Always patch test: Especially for ingredients like lemon and tea tree oil.
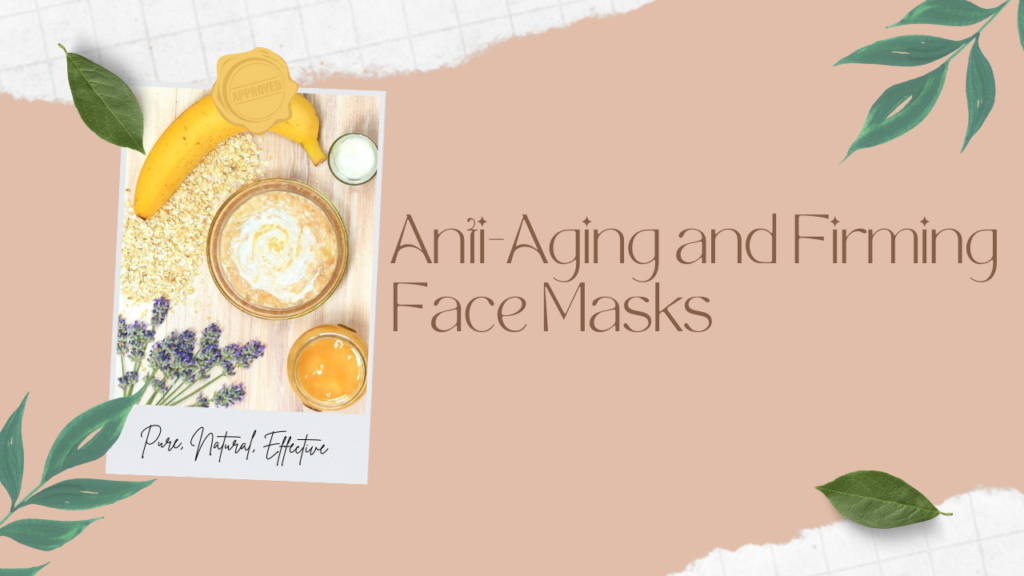
Aging is natural, but premature fine lines, sagging, and dullness can be signs that your skin needs extra care and nourishment. As we grow older — or even due to stress, lack of sleep, and environmental exposure — our skin gradually loses collagen, elasticity, and moisture. The result? Skin that looks tired, less plump, and less firm. Anti-aging and firming face masks can help counteract these signs by boosting skin regeneration, tightening the skin, and infusing it with antioxidants and nutrients that support a youthful glow.
Why Firming and Anti-Aging Masks Matter
From your mid-20s onward, collagen production begins to slow down. As elasticity decreases, you may notice:
- Fine lines around the eyes and mouth
- A less defined jawline
- Dull or rough skin texture
- Loss of natural glow
Anti-aging DIY masks offer a gentle and chemical-free way to nourish the skin and delay the visible signs of aging. These natural ingredients help stimulate blood circulation, promote skin cell renewal, and give your face a fresher, tighter appearance — without needing expensive treatments.
DIY Anti-Aging & Firming Face Mask Recipes
1. Egg White and Honey Firming Mask
One of the most effective natural skin-tightening masks for instant results.
Ingredients:
- 1 egg white
- 1 teaspoon raw honey
- A few drops of lemon juice (optional for brightness)
How to Use:
Whisk the egg white until frothy and mix in honey (and lemon juice if desired). Apply a thin layer to your face, avoiding the eyes. Let it dry completely — you’ll feel your skin tightening. Wash off with cold water.
Why it Works:
Egg white tightens the skin and shrinks pores. Honey nourishes, hydrates, and helps soften fine lines. Together, they leave the skin smoother and lifted.
2. Banana and Vitamin E Rejuvenating Mask
This rich and nourishing mask boosts elasticity and deeply hydrates aging skin.
Ingredients:
- ½ ripe banana
- 1 Vitamin E capsule (or ½ teaspoon Vitamin E oil)
- 1 teaspoon yogurt
How to Use:
Mash the banana and mix it with the contents of the Vitamin E capsule and yogurt. Apply the mixture and leave it on for 20 minutes. Rinse with lukewarm water.
Why it Works:
Banana is packed with antioxidants and natural oils that combat dryness and wrinkles. Vitamin E repairs skin damage and promotes elasticity, while yogurt soothes and mildly exfoliates.
3. Avocado and Cacao Glow Mask
A decadent, collagen-boosting mask that leaves skin supple and radiant.
Ingredients:
- ¼ ripe avocado
- 1 tablespoon raw cacao powder
- 1 teaspoon honey
How to Use:
Mash the avocado and mix in the cacao powder and honey until smooth. Apply and relax for 15–20 minutes before rinsing.
Why it Works:
Avocado deeply nourishes with healthy fats and vitamins. Raw cacao is a powerhouse of antioxidants that fight free radicals. This combo enhances skin elasticity and adds a youthful glow.
4. Coffee and Yogurt Tightening Mask
Great for reducing puffiness and reviving tired, dull skin with visible firmness.
Ingredients:
- 1 tablespoon finely ground coffee
- 1 tablespoon plain yogurt
How to Use:
Mix both into a smooth paste. Gently apply in circular motions, then leave the mask on for 15 minutes. Wash off with cold water to tighten pores.
Why it Works:
Caffeine stimulates blood flow, firms the skin, and reduces puffiness. Yogurt hydrates and lightly exfoliates, making your skin feel smooth and refreshed.
Tips to Maximize Anti-Aging Benefits
- Be consistent: Use these masks 1–2 times per week to see long-term results.
- Massage gently: While applying and removing, use upward strokes to promote lifting.
- Hydrate afterward: Always follow with a rich moisturizer or facial oil to lock in benefits.
- Don’t skip sunscreen: Sun exposure is the #1 cause of premature aging — protect your skin daily.
- Stay hydrated from within: For truly plump, youthful skin, drink enough water and eat antioxidant-rich foods.
How To Add DIY Glow Face Masks Into Your Skincare Routine
Creating face masks at home can be relaxing and incredibly beneficial — but using them the right way is just as important as the ingredients you choose. Many people either overdo it or apply masks at the wrong time in their routine, which leads to underwhelming results or even irritation. When incorporated thoughtfully, DIY masks can become a key part of your glow-up ritual — enhancing hydration, clearing breakouts, soothing sensitivity, or simply giving you that lit-from-within look before a special occasion.
Here’s how to blend these natural treats seamlessly into your weekly skincare rhythm.
1. Know Your Skin’s Current Needs
The first rule? Listen to your skin. Is it feeling tight and flaky? You’ll need a hydrating mask. Breaking out with oiliness? Time to reach for something clarifying. The beauty of DIY masks is that you can customize them depending on your skin’s mood that week. Rotate between masks like:
- Hydrating (2x a week if your skin feels dry)
- Oil-Controlling (1–2x a week for oily/combo skin)
- Firming or Anti-aging (1x a week, especially at night)
- Soothing (any time skin feels stressed or red)
You can even try multi-masking — applying different masks to different areas of your face to target multiple concerns at once.
2. Apply Masks on Clean, Damp Skin
Always start with freshly washed skin. Remove makeup, cleanse gently, and pat your skin slightly dry — masks work best on slightly damp skin because it enhances ingredient absorption.
Optional Step: Steam your face for 2–3 minutes before applying the mask. This opens pores and preps the skin to drink in all the nourishing ingredients.
3. Timing Is Key — Don’t Overdo It
Most DIY masks should be left on for 10–20 minutes — no more. Leaving a clay or exfoliating mask on too long can actually strip your skin or cause sensitivity. Set a timer, relax, and rinse off when the time is up.
- Hydrating & soothing masks: 15–20 minutes
- Oil-control & detox masks: 10–15 minutes
- Firming masks with egg or turmeric: 10–12 minutes max
Over-masking or using too many actives in one day can backfire, so space out your masking sessions.
4. Seal in the Glow
After rinsing off your mask, don’t skip the follow-up. Even natural ingredients can leave your skin exposed or slightly sensitive, so it’s important to complete your routine.
Follow with:
- A gentle toner or rose water mist
- A lightweight serum or facial oil (optional)
- A nourishing moisturizer
- And always SPF in the daytime, even if you’re indoors!
This helps lock in all the goodness and strengthens your skin barrier.
5. Make It a Ritual, Not a Chore
Turn your mask time into a self-care session. Light a candle, play calming music, sip herbal tea — and enjoy the ritual. When skincare becomes something you look forward to, you’re more likely to stay consistent.
You can even make it a weekly routine with themes like:
- “Soothing Sundays” with calming oatmeal masks
- “Glow-up Thursdays” with a firming or brightening treatment
- “Multimask Mondays” for targeting combo skin zones
Beautiful, radiant skin doesn’t always come from fancy products or expensive treatments — sometimes, the most effective solutions are right in your kitchen. Whether you’re battling dryness, excess oil, sensitivity, or early signs of aging, these DIY face masks offer gentle, natural care tailored to your skin’s unique needs. The key is consistency, self-awareness, and a little creativity.
Remember, skincare is more than just routine — it’s a form of self-love. By incorporating these nourishing, homemade masks into your weekly rituals, you’re not just treating your skin — you’re nurturing your confidence, well-being, and glow from within.
So go ahead — mix, mask, and make time for yourself. Because glowing skin isn’t just a goal; it’s a reflection of how well you care for you.
Loved these DIYs?
Explore more clean beauty tips and glowing skin rituals on Gleamora. And don’t forget to comment if you try any of these masks — we love seeing your self-care in action!